Author Archives: Mechanic

DD15 EPA10 GHG14 TEMPORARILY BYPASS DPF/DEF DERATE

Published / by Mechanic / Leave a Comment

This is will work on Freightliner Cascadia’s with DD15 engines(EPA10 or GHG14)

1. Confirm derate is due to active ACM fault (DPF/DOC/SCR related). Turn off engine.
2. Open hood
3. Find PNDB fuse box (located to the left of the steering shaft coming out the firewall). Fuse box has 2 yellow locks & flashing red light
4. Open cover & remove green 30amp mini fuse (labelled ACM)
5. Once removed. Close fuse box & hood.
6. Start engine
7. Truck will have engine stop warning(Ignore)
8. Find the “engine overide” button on the dash (typically located beside regen button)
9. Hold down button and drive unit.
10. Truck will now drive @55mph (95km/hr). But driver will have to continue to hold down the button.

THIS IS A TEMPORARY FIX. THIS WILL ALLOW DRIVER TO MAKE IT TO THE YARD/REPAIR SHOP.

SPN 4374 FMI 1 GHG14 OVER PRESSURIZED DEF SYSTEM

Published / by Mechanic / Leave a Comment

Over Pressurized DEF System
SPN 4374/FMI 1
Description Over Pressurized Diesel Exhaust Fluid (DEF) System
Monitored Parameter DEF Pump Speed vs. DEF Pressure
Typical Enabling Conditions DEF Pump Enabled OR On-Off-Cycle Request
Monitor Sequence None
Execution Frequency Continuous When Enabling Conditions Met
Typical Duration 2 Minutes
Dash Lamps MIL, CEL
Engine Reaction None
Verification ADS Self-check

Check as follows:

Show/Hide Checkboxes
1. Connect DiagnosticLink® .

2. Turn the ignition ON (key ON, engine OFF).

3. Check for multiple codes. Are any other faults active in addition to SPN 4374/FMI 1?1. Yes; Diagnose and repair the other faults first. Verify repair.
2. No; Go to step 4.

4. Verify the Aftertreatment Control Module (ACM) software level is e5.57.0.0 or newer. Compare the current ACM software level to the server. Is the ACM software at the latest level?
1. Yes; Go to step 5.
2. No; update the ACM software level and perform the verification procedure in the table above. If the fault code does not return, release the vehicle. If the fault code returns, Go to step 5.

5. Turn the ignition OFF.

6. Disconnect the DEF dosing unit electrical harness connector.

7. Inspect the DEF dosing unit electrical harness wiring and connector for signs of damage, bent, spread, corroded or unseated (pushed out) pins, moisture in the connector or wire damage near the connector. Is any damage found?
1. Yes; repair as necessary. Perform Selective Catalytic Reduction Airless Dosing System (SCR ADS) Self-Check Routine to verify repairs.
2. No; Reconnect harness connector. Go to step 8.

8. Disconnect the DEF return line from the DEF dosing unit. Refer to section “Removal of the GHG14 Diesel Exhaust Fluid Lines” . Connect a temporary drain hose from the DEF dosing unit return fitting into a DEF-safe container.

9. Clear fault codes.

10. Perform SCR ADS Self-Check Routine. Did the SCR ADS test pass with flow from dosing unit return line into the DEF-safe container?
1. Yes; Replace DEF return line. Go to step 11.
2. No; replace DEF dosing unit. Refer to section “Removal of the GHG14 Dosing System Doser” . Verify repair.

11. Reconnect all DEF lines and connectors. Perform SCR ADS Self-Check Routine to prime the system. Did the SCR ADS Self-Check Routine complete successfully?
1. Yes; release vehicle.
2. No; replace DEF dosing unit.

SPN 4374 FMI 0 GHG14 UNDER PRESSURIZED DIESEL EXHAUST FLUID SYSTEM

Published / by Mechanic / Leave a Comment

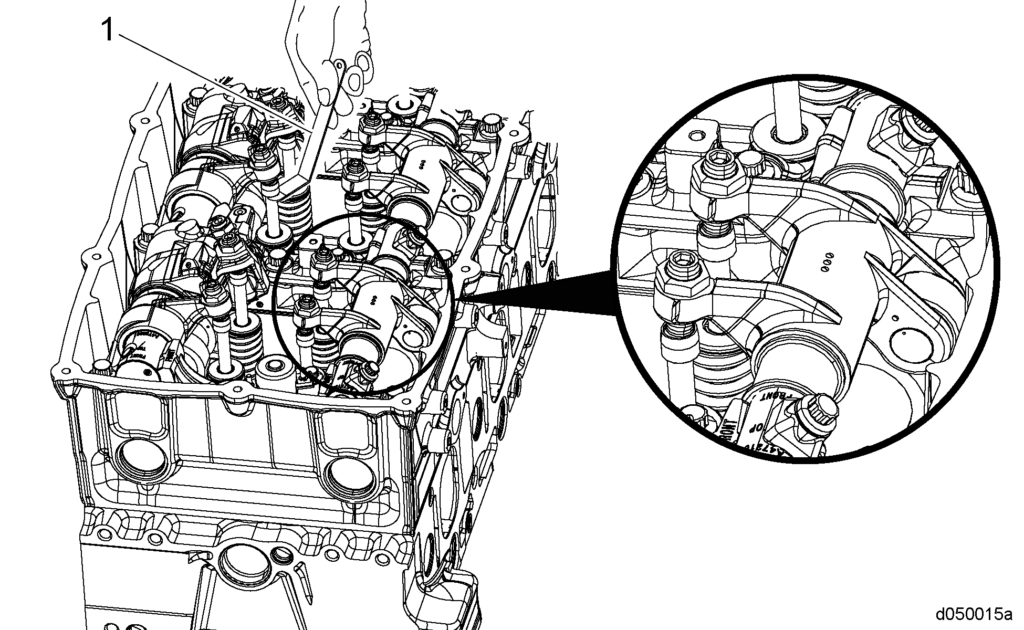
Under Pressurized Diesel Exhaust Fluid System

SPN 4374/FMI 0

Description This Code Sets When the Diesel Exhaust Fluid (DEF) Pump Speed is Higher than Normal For a Given DEF Pressure
Monitored Parameter DEF Pump Speed, DEF Pressure
Monitor Sequence None
Execution Frequency Continuous When Enabling Conditions Met
Typical Duration Continuous Until Resolved
Dash Lamps MIL, CEL
Engine Reaction Derate 25%
Verification SCR ADS Self-Check

Possible causes:
• Restriction in the DEF line between the DEF tank and the DEF pump
•Restriction in the DEF line between the DEF pump and the DEF dosing unit
• Air in the DEF line between the DEF tank and the DEF pump
• Restriction in the DEF pump
•Failed DEF pump

Check as follows:

Show/Hide Checkboxes

NOTICE:
Customers in colder climates where winter ambient air temperatures generally stay below -11° C (12°F) need to verify that the DEF is not frozen before troubleshooting this fault code.
1. Connect DiagnosticLink® .
2. Turn the ignition ON (key ON, engine OFF).
3. Check for multiple codes. Are codes SPN 4334/FMI 3, 4, SPN 4375/FMI 3, 4, or SPN 3361/FMI 3, 4, 5 also present?1. Yes; diagnose and repair the other fault codes first. Verify repair.
2. No; Go to step 4.

4. Turn the ignition OFF.
5. Inspect the DEF tank vent tube. Is there any blockage or restriction?1. Yes; clear the restricted vent tube. Go to step 6.
2. No; Go to step 6.

6. Using DEF test strip A0005850202, check for diesel fuel or oil contamination of the DEF fluid. Does the test strip indicate contamination?1. Yes; replace the following components and refill the system with new DEF:
◾ DEF tank
◾ DEF tank header
◾ DEF supply line from the DEF tank to the DEF pump
◾ DEF line from the DEF pump to the DEF dosing unit
◾ DEF return line from the DEF dosing unit to the DEF tank
◾ DEF pump
◾DEF dosing unit

2. No; Go to step 7.

To avoid injury from flying debris when using compressed air, wear adequate eye protection (face shield or safety goggles) and do not exceed 276 kPa (40 psi) air pressure.
7. Inspect the DEF line that runs from the DEF pump to the DEF dosing unit. Is the DEF line damaged, pinched, or kinked?1. Yes; replace the DEF line from the DEF pump to the DEF dosing unit.
2. No; Go to step 8.

8. Inspect the DEF line that runs from the DEF tank to the DEF pump. Is the DEF line damaged, pinched, or kinked?1. Yes; replace the DEF line from the DEF tank to the DEF pump.
2. No; Go to step 9.

9. Disconnect the DEF supply line at the dosing unit. Fill the graduated cylinder supplied in DEF test kit (P/N: W060589001900) with water. Place the end of the DEF line into the graduated cylinder as far as possible.

NOTE: Place the graduated cylinder in a secondary container to catch over flowing DEF fluid, making sure you still have clear sight of the end of the DEF line.
10. Using DiagnosticLink, perform the Selective Catalyst Reduction Airless Dosing System (SCR ADS) Self-Check routine. When the service routine is running, visually inspect the DEF line for continuous air bubbles coming from the line and DEF flow.
11. Were any bubbles coming from the DEF pump supply line indicating a crack in the DEF pump feed line?1. Yes; replace the DEF supply line from the DEF tank to the DEF pump. Verify repair.
2. No; Go to step 12.

12. Remove the DEF tank header.
13. Inspect inside the DEF tank for debris that may be floating around or stuck to the DEF tank header pick up screen. Was any debris found?1. Yes; flush out the DEF tank and clean the DEF tank header filter screen. Go to step 14.
2. No; Go to step 14.

NOTICE:
The RS SUPPLY KIT contains all the necessary parts for steps 14-17.14. Using the DEF/Doser Kit (RS SUPPLY KIT – available through eParts catalog), replace the DEF pump module filter. Refer to section “Installation of the GHG14 Diesel Exhaust Fluid Pump Filter” . Go to step 15.

15. Replace the DEF pump inlet screen. Refer to section “Installation of the Diesel Exhaust Fluid Pump Module Filter Screen” . Go to step 16.
16. Replace DEF Pressure Relief Valve (PRV). Refer to section “Removal of the Diesel Exhaust Fluid Pump Pressure Relief Valve” . Go to step 17.
17. Replace DEF dosing unit inlet screen. Refer to section “Removal of the GHG14 Diesel Exhaust Fluid Dosing Unit Inlet Screen” . Go to step 18.

NOTE: If air pressure is greater than 827 kPa (120 psi), use a pressure regulator.
18. Prime pump with shop air. Using a rubber tipped air gun to seal around the DEF pump inlet fitting, apply clean regulated shop air to the DEF pump inlet fitting for three to five seconds.
d140723a

19. Connect all DEF lines and electrical connections. Go to step 20.

NOTE: Performing the Selective Catalytic Reduction Airless Dosing System (SCR ADS) Self-Check Routine may fail the first couple of times until the system is fully primed.
20. Perform Selective Catalytic Reduction Airless Dosing System (SCR ADS) Self-Check Routine two times to further prime the system. Ignore the results of these two tests and Go to step 21.
21. Perform Selective Catalytic Reduction Airless Dosing System (SCR ADS) Self-Check Routine to check the operation of the system. Did the SCR ADS test pass?1. Yes; replacing the DEF Pressure Relief Valve (PRV) in the kit resolved the concern. No further diagnostics or repairs are needed.
2. No; replace the DEF pump.

SPN 521049 FMI 31 GHG17 DEF INDUCEMENT DEF LAMP ACTIVE

Published / by Mechanic / Leave a Comment

DEF Inducement DEF Lamp Active

SPN 521049/FMI 31

Description This Code Sets When There is a Code Present for the Diesel Exhaust Fluid (DEF) Tank Level, DEF Dosing Unit, DEF Pump, NOx Sensors, Blocked DEF Line, DEF Quality, NOx Efficiency, Selective Catalyst Reduction (SCR) Harness and/or SCR Sensor.
Monitored Parameter SCR and Diesel Particulate Filter (DPF) Sensors
Typical Enabling Conditions Always Enabled
Monitor Sequence None
Execution Frequency Always Enabled
Typical Duration Two Seconds
Dash Lamps DEF Lamp
Engine Reaction 25% Derate
Verification High Idle Regeneration followed by a Parked SCR Efficiency Test

Check as follows:

Show/Hide Checkboxes
1. Connect DiagnosticLink®

2. Turn the ignition ON (key ON, engine OFF).

During parked regeneration the exhaust gases will be extremely HOT and could cause a fire if directed at combustible materials. The vehicle must be parked outside.

3. Check for other emission-related fault codes. Are there any Selective Catalyst Reduction (SCR) or Diesel Particulate Filter (DPF) related fault codes present?1. Yes; diagnose and repair the emission-related fault codes first. Verify repair.

2. No; perform a high idle regeneration. When the engine returns to idle, turn the ignition OFF and wait for all the modules to power down (usually about one minute). Turn the ignition ON (key ON, engine OFF) and wait one minute, then start the engine and run a Parked SCR efficiency test. Use DiagnosticLink to clear the code.

DD15 Torque Values (Cylinder Head, Main bearings, Rod bearings)

Published / by Mechanic / Leave a Comment

Using the sequence shown below, torque the 38 large bolts in four steps to:
◦50 N·m (37 lb·ft).
◦250 N·m (184 lb·ft).
◦ 90° torque turn.
◦90° torque turn

DD15 CYLINDER HEAD TORQUE


The end play specification is 0.099 to 0.419 mm (0.0039 to 0.0165 in.). Insufficient end play can be the result of a misaligned No. 6 main bearing, a misaligned upper thrust washer or debris on the inner face of one or more of the thrust washers.
Correct the end play, if necessary.

NOTE: If the main bearings have been installed properly, the crankshaft will turn freely with all of the main bearing cap bolts drawn to the specified torque.
For the DD13: torque all of the main bearing cap bolts, in three steps, using the sequence shown below. Torque the main bearing cap bolts to:

1. 150 N·m (111 lb·ft)
2. 300 N·m (221 lb·ft)
3. 90° torque turn

For the DD15 and DD16; torque all of the main bearing cap bolts, in four steps, using the sequence shown below. Torque the main bearing cap bolts to:

1. 150 N·m (111 lb·ft)
2. 250 N·m (184 lb·ft)
3. 1st 90° torque turn
4. 2nd 90° torque turn

DD15 MAIN BEARING TORQUE

Using new bolts, install the bearing cap (3) on the rod (1) with the numbers (2) on the same side.
d030060

Torque the connecting rod bolts alternately to the following:
For the DD13: 180 N·m (133 lb·ft) + 90° torque turn
For the DD15: 115 N·m (85 lb·ft) + 180° torque turn
For the DD16: 115 N·m (85 lb·ft) + 180° torque turn

DD15 CONNECTING ROD TORQUE

DD15 Tune Up Procedure/ Valve Lash

Published / by Mechanic / Leave a Comment

1. Turn engine OFF, (key OFF, engine OFF).


Do not power wash or steam clean the engine bay in the area of vehicle electrical components, unless specified by vehicle manuals or service literature. Power washing/steam cleaning can permanently damage these components, which could result in fire, personal injury, or property damage.

DD15 TUNE UP
2. Steam clean the engine.
3. Disconnect the starting power for the engine. Refer to OEM procedures.
4. Remove the air cleaner and the turbocharger inlet pipe and hose. Refer to OEM procedures.
5. Remove air cleaner housing. Refer to OEM procedures.
6. Remove the rocker cover. Refer to section “Removal of the Rocker Cover”
7. Using special tool (J-46392 or W904589046300), bar the engine over until cylinder number one is at Top Dead Center (TDC) compression stroke.
8. Using a feeler gauge (1), lash intake valves one, two and four to 0.4 mm (0.016 in.).1. Figure below displays the old style intake camshaft with 12 lobes and the old style rocker arms. These components were utilized on DD13 engines built before engine serial number HDE0079072 and on the DD15 & DD16 engines built before HDE0077481.
d050015

2. Figure below displays the new style intake camshaft with 6 lobes and bridged rocker arms. These components were installed on DD13 engines beginning with engine serial number HDE0079072 and on the DD15 &DD16 engines beginning with engine serial number HDE0077481. The components are not backwards compatible.
d050015a

DD15 VALVE ADJUSTMENT

9. Using a feeler gauge (1), lash exhaust valves one, three and five to 0.6 mm (0.024 in.).
10. Using special tool (J-46392 or W904589046300), bar the engine over 360° until cylinder number six is at TDC compression stroke.
11. Lash intake valves three, five, and six to 0.4 mm (0.016 in.).
12. Lash exhaust valves two, four and six to 0.6 mm (0.024 in.).
13. Torque the locknut valve adjusting screw to 50 N·m (37 lb·ft).
14. Remove any tools used for this procedure.
15. Set the engine brake lash.


DD15 ENGINE BRAKE/ JAKE BRAKE LASH ADJUSTMENT

1. Set the lash on all the exhaust adjusting screws first (all the adjusting screws in direct contact with the exhaust valves).
2. Rotate the engine until a given cylinder is at maximum intake lift. When this is reached, the brake lash can be set on this cylinder.
3. When the engine brake rocker arm is in contact with the exhaust valve, set the lash between the engine brake rocker arm adjusting screw and the actuator piston stem.1. DD15 & DD16 engines built before HDE0077481 use Engine Brake Adjustment tool W470589022300; set the lash to 4.1 mm (0.1614 in.).
2. DD 15 & DD16 engines built starting with HDE0077481 use Engine Brake Adjustment tool W470589042300; set the lash to 4.6 mm (0.1811 in.).
3. DD13 engines built before HDE0079072 use Engine Brake Adjustment Tool W470589022300; set the lash to 4.1 mm (0.1614 in.).
4. DD13 engines built starting with HDE0079072 use Engine Brake Adjustment tool W470589042300; set the lash to 4.6 mm (0.1811 in.).

4. Lash the engine brakes in the following firing order: 1, 5, 3, 6, 2, and 4.
5. Torque the locknut valve adjusting screw to 50 N·m (37 lb·ft).
6. Install the rocker cover

DD12 NOT GOING INTO GEAR/ SPLIT ROD BUSHING REPAIR

Published / by Mechanic / Leave a Comment

ISSUE
Detroit™ DT12™ automated manual transmissions may experience difficulty going into gear, especially when the transmission is not at operating temperature.
CAUSE
The steel split rod wears on the aluminum transmission housing, causing the split rod to stick. The Shift Controller cannot read the correct position of the split rod and will not shift into gear. To correct this, a hardened steel bushing and new design split rod with three flattened sides were implemented with transmissions built in August, 2016. For Detroit-built transmissions (transmission serial number beginning with 716), the change took place on August 9, 2016, with approximate transmission serial number 716310E0008107. For German-built transmissions (transmission serial number beginning with 715), the change took place on August 29, 2016, with approximate transmission serial number (last seven digits) 1806530. See Figure 1 for the new bushing and split rod.

NEW SPLIT PIN BUSHING

SPN 3719/FMI 0 SOOT LEVEL VERY HIGH

Published / by Mechanic / Leave a Comment

Soot Level Very High

NOTE: Do not interrupt regeneration once it has been initiated.

NOTE: When this code is detected, the operator has two minutes to execute the entry conditions, cycle clutch switch (manual transmission), cycle parking brake, cycle neutral switch (automatic transmission), then initiate regeneration request. If this procedure is not completed within this time limit, the engine will shut down and the regeneration procedure must be restarted.

During parked regeneration the exhaust gases will be extremely HOT and could cause a fire if directed at combustible materials. The vehicle must be parked outside.

  1. Perform a parked regeneration.
  2. Clear all codes following the completion of the parked regeneration.